


★
(0 Reviews)
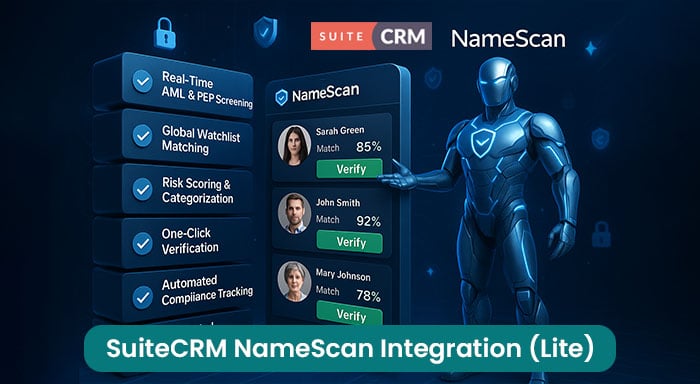
SuiteCRM NameScan Integration (Lite)
$249.00
Product Description
The SuiteCRM 8 NameScan Integration is a compliance solution designed to help businesses perform AML (Anti-Money Laundering) and PEP (Politically Exposed Persons) screenings seamlessly within SuiteCRM. With an API-based connection, this integration allows users to verify individuals and organizations against global watchlists, sanction lists, and adverse media databases—ensuring regulatory compliance and reducing financial risks.
By automating risk assessment directly in SuiteCRM, businesses can streamline their due diligence process, eliminate manual checks, and make informed decisions quickly.
Real-Life Example: How a Financial Services Company Benefits from NameScan Integration
Company: SecureFinance Ltd.
Industry: Financial Services
Challenge: Ensuring compliance with AML regulations while reducing the time spent on manual background checks.
Before Integration:
SecureFinance Ltd. manually checked new clients against global watchlists, which were:
- Time-consuming (10–15 minutes per check).
- Prone to human error, leading to compliance risks.
- Disruptive to workflow, requiring multiple tools.
After Implementing SuiteCRM 8 NameScan Integration:
- Automated Screening: Every new client is automatically checked against AML and PEP databases.
- Instant Risk Categorization: The system displays flagged entities with match scores.
- Quick Decision-Making: Compliance officers verify or reject clients in one click.
Results:
- ✔ 80% Faster Screening: Reducing manual work.
- ✔ Error-Free Compliance: No missed high-risk individuals.
- ✔ Faster Onboarding: Secure, seamless client verification.

Key Features
Discover what makes this product stand out
Real-Time AML & PEP Screening
Instantly verify contacts and accounts.
Global Watchlist Matching
Cross-check names against sanctions, financial crime databases, and adverse media.
Risk Scoring & Categorization
View match confidence levels for better decision-making.
Visual Showcase
See the product in action through screenshots


1
2
3
4
5
6
7
Product Videos
Watch our product in action
Are you looking for a simple and effective way to enhance compliance, reduce fraud risks, and streamline customer verification in SuiteCRM?
User Guide
Learn how to use and configure the system step by step


FAQs
Question? Look here.
Is NameScan supported on all SuiteCRM versions?
Yes, NameScan is compatible with all versions of SuiteCRM, including: SuiteCRM 7 SuiteCRM 8 SuiteCRM 7.10, 7.11, 7.12, and later
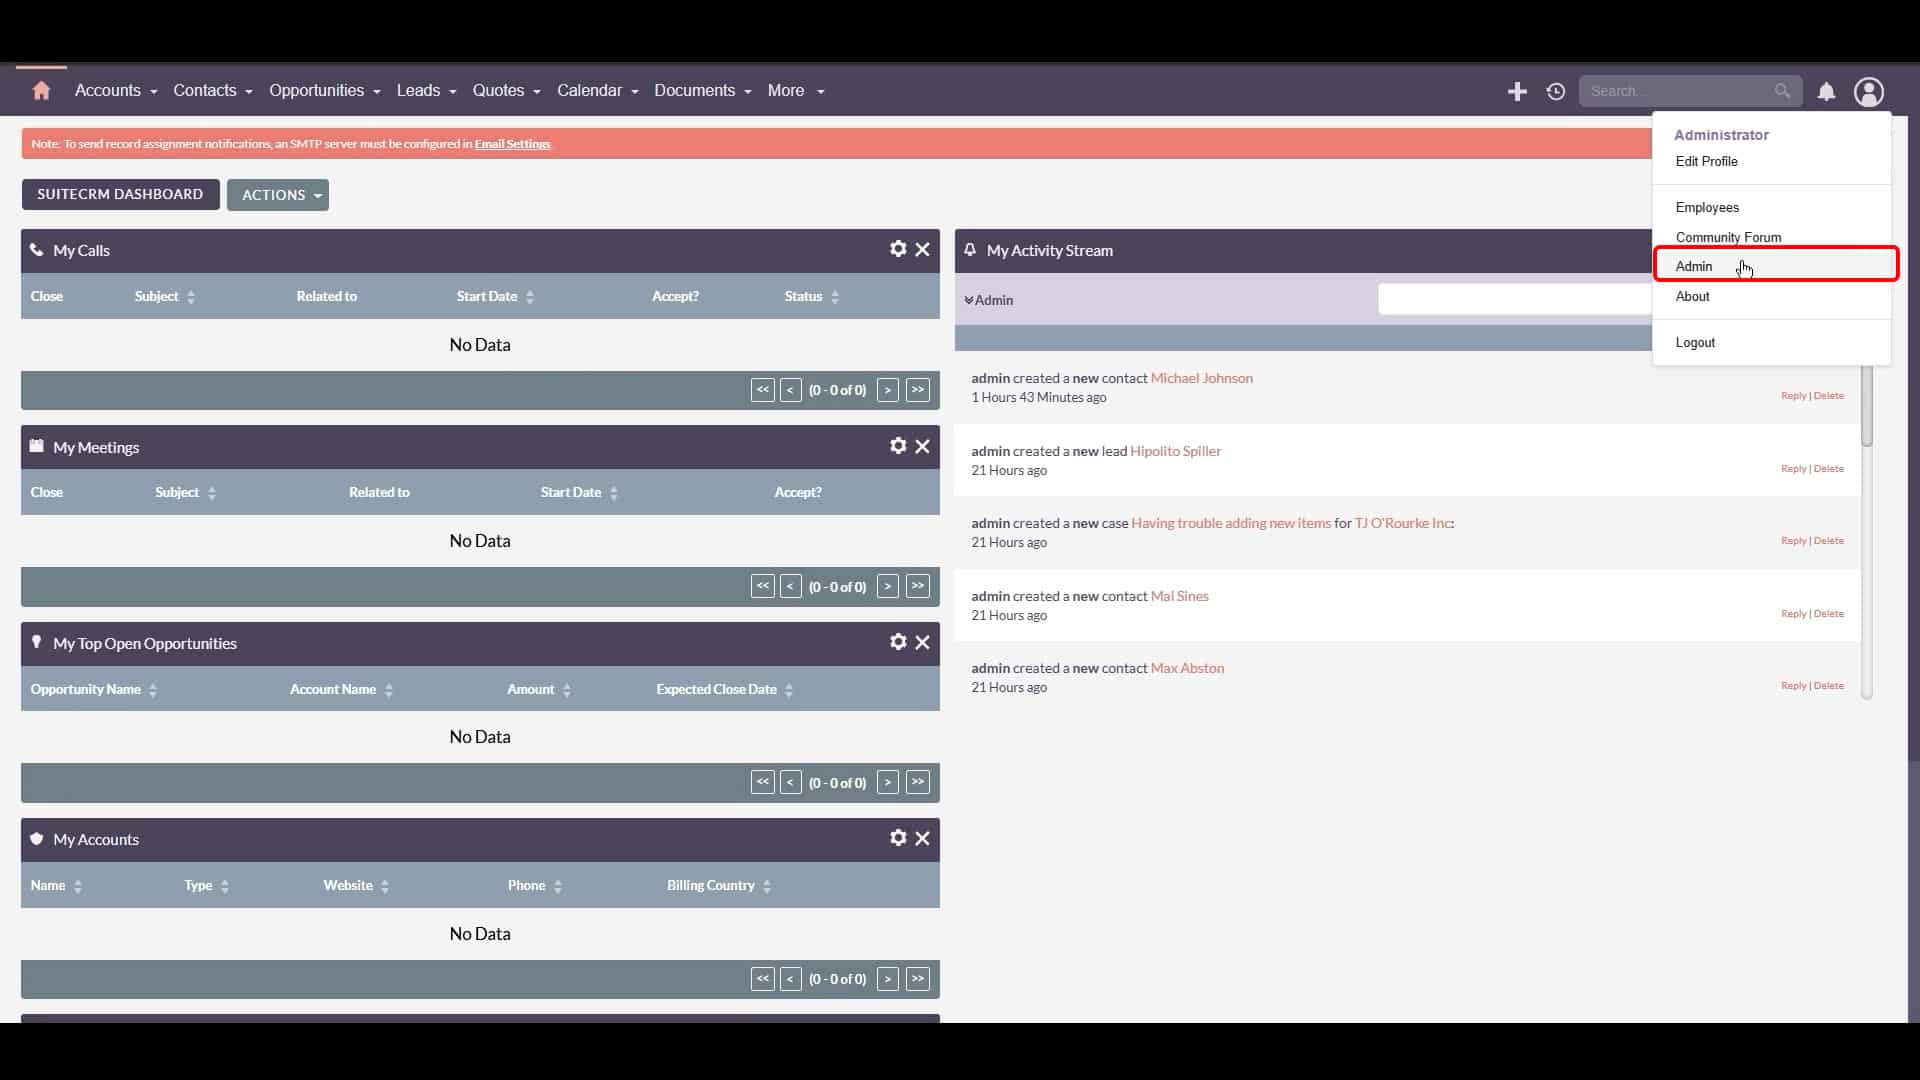
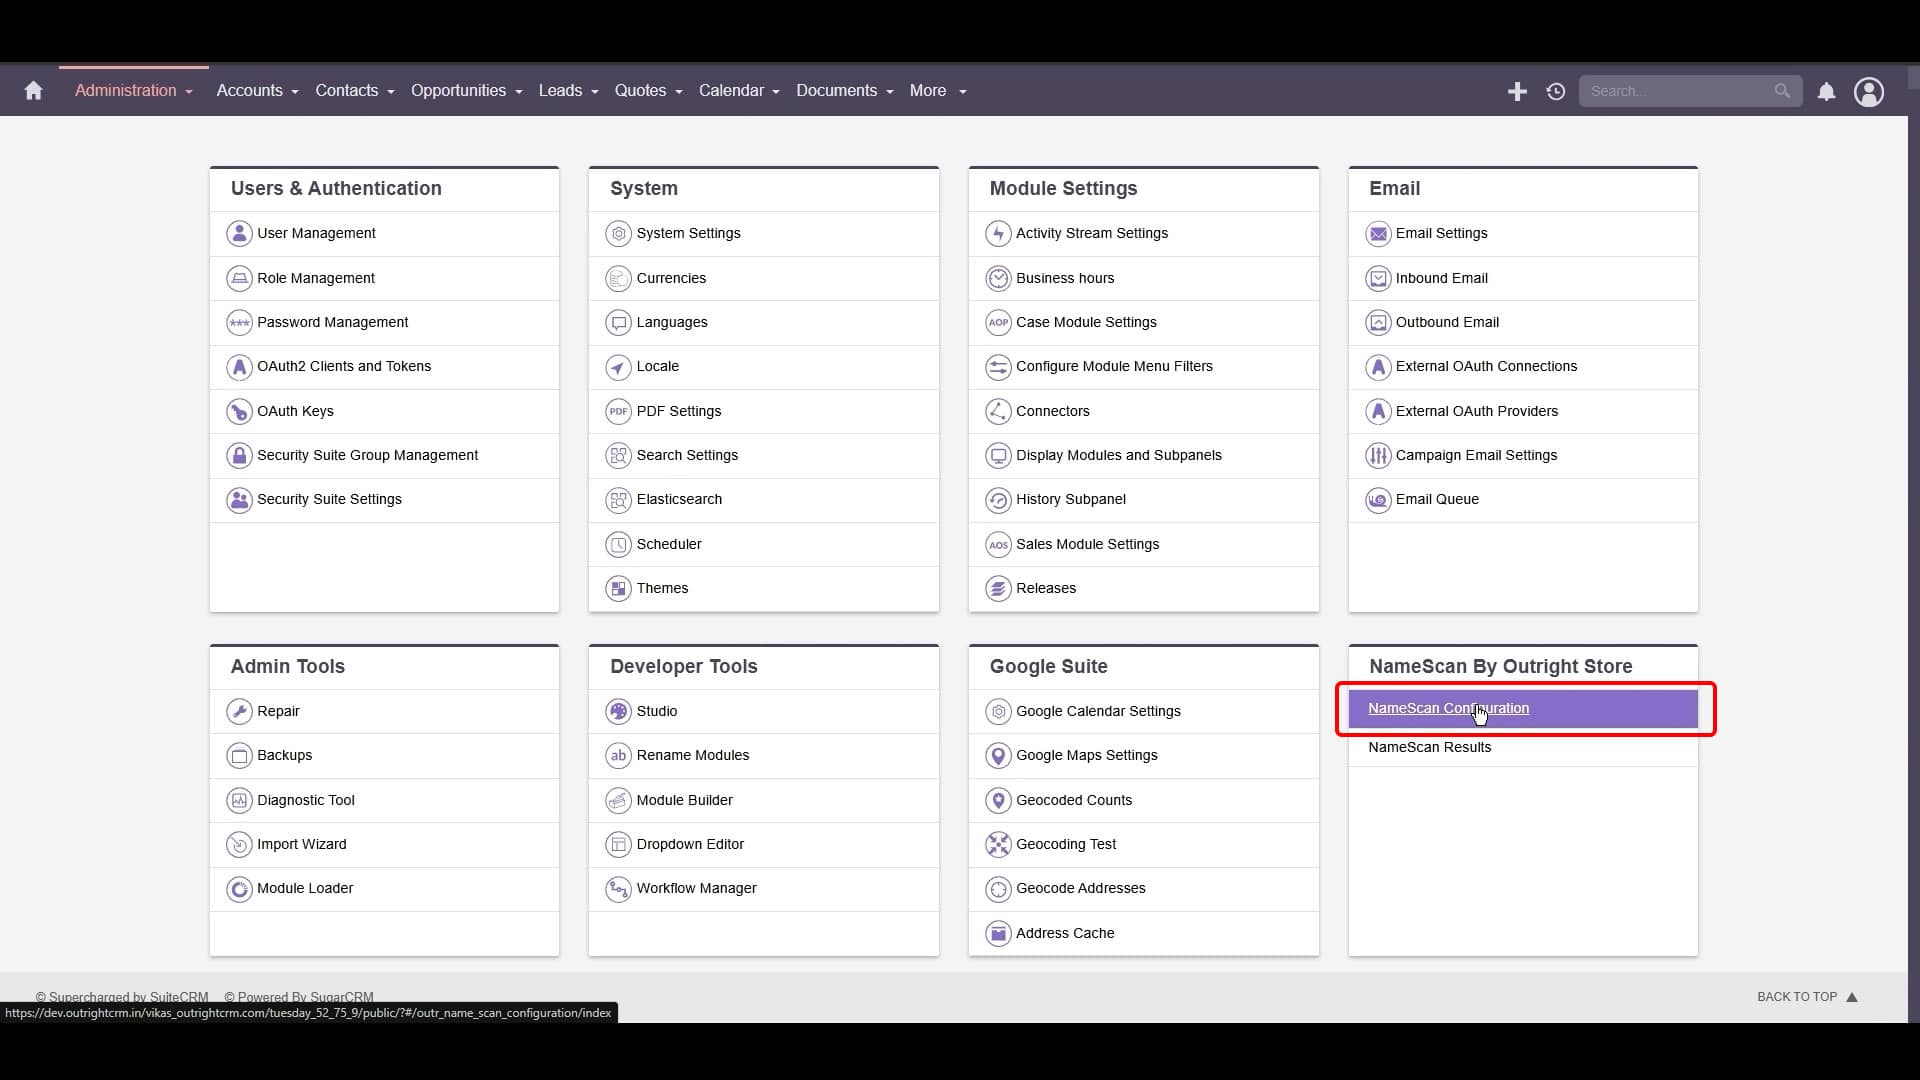
How do I access the NameScan configuration page within SuiteCRM?
To access the NameScan configuration page, first log in to your SuiteCRM account. Navigate to your profile, then click on "Admin." In the Admin section, locate "NameScan by Outright Store," typically found in the bottom-right corner, and click on "NameScan Configuration." This will open the setup page where you can manage NameScan settings.
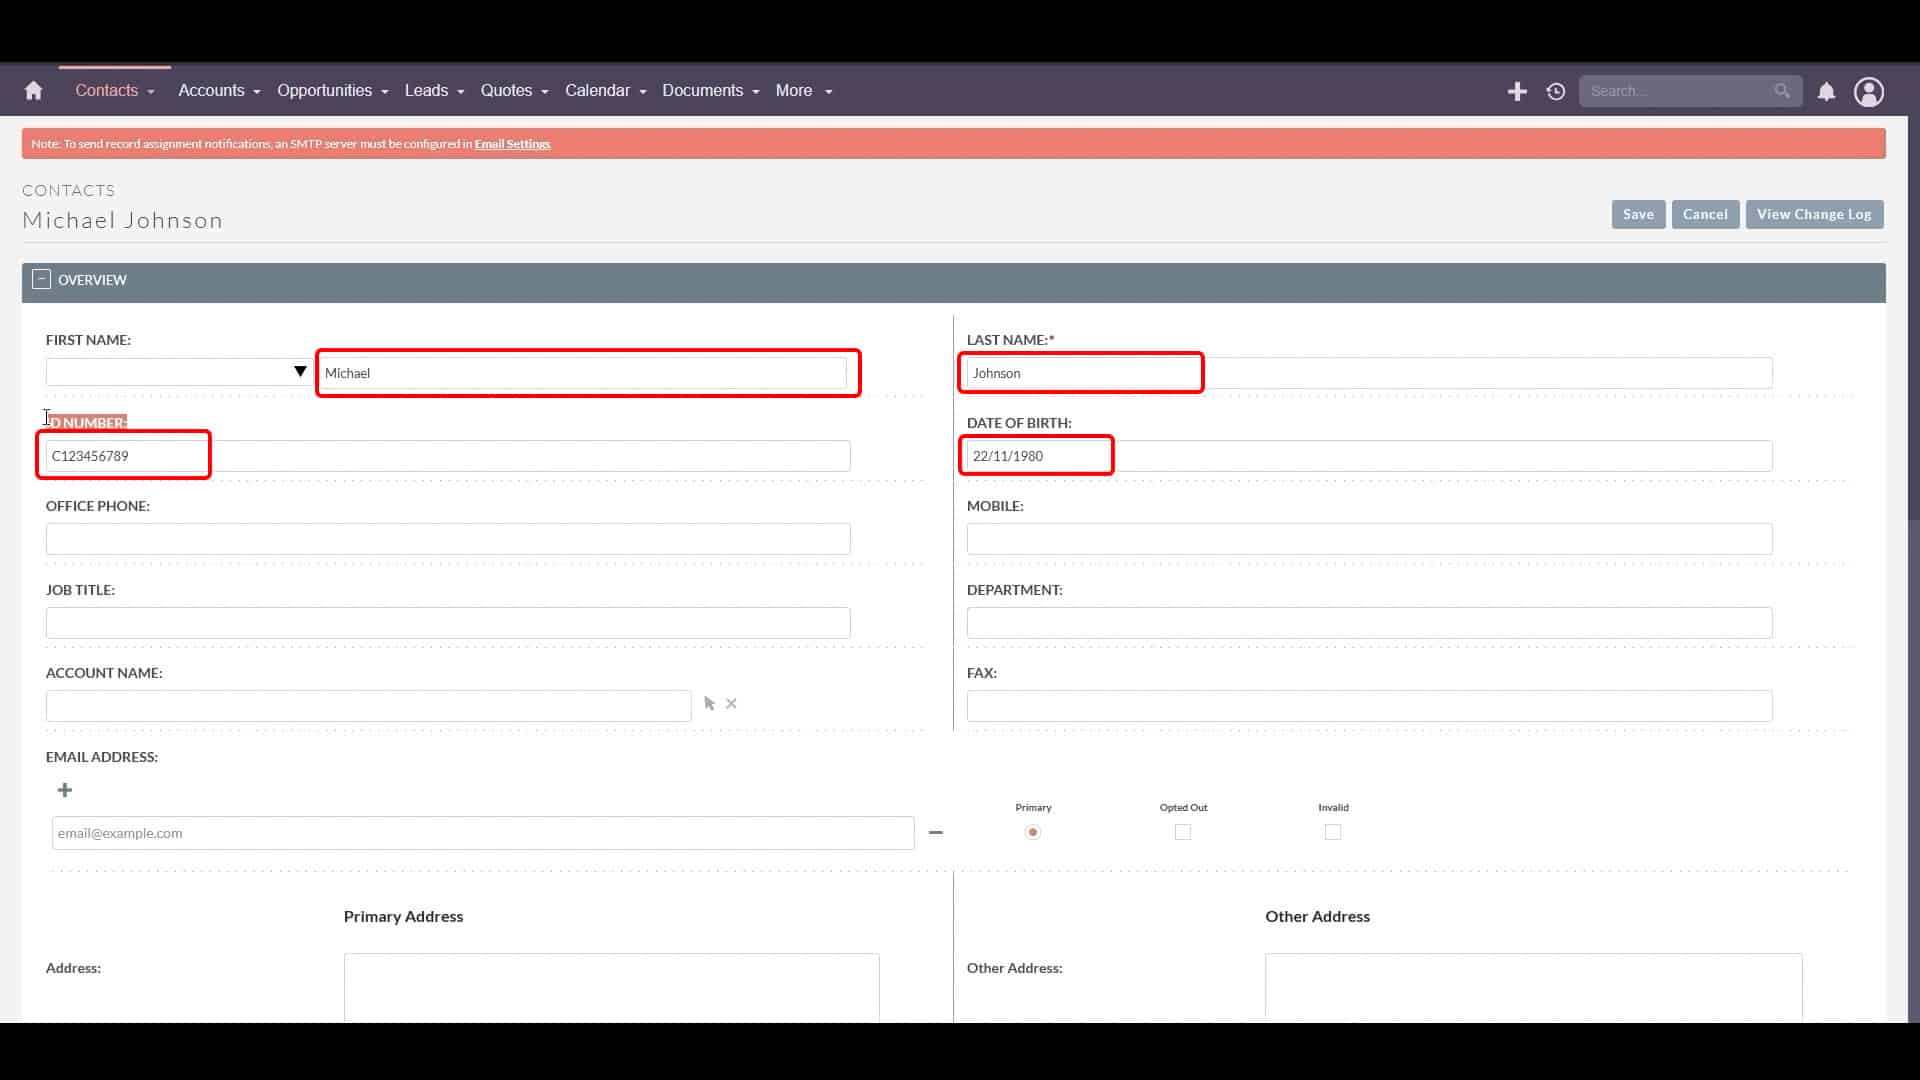
What information is needed when creating a new record for NameScan to search?
When creating a new record to be searched by NameScan, you'll need accurate contact details. This includes the first name, last name, a Unique ID (such as an identification number), the date of birth, and the contact's country. Providing accurate information helps ensure reliable search results from NameScan.
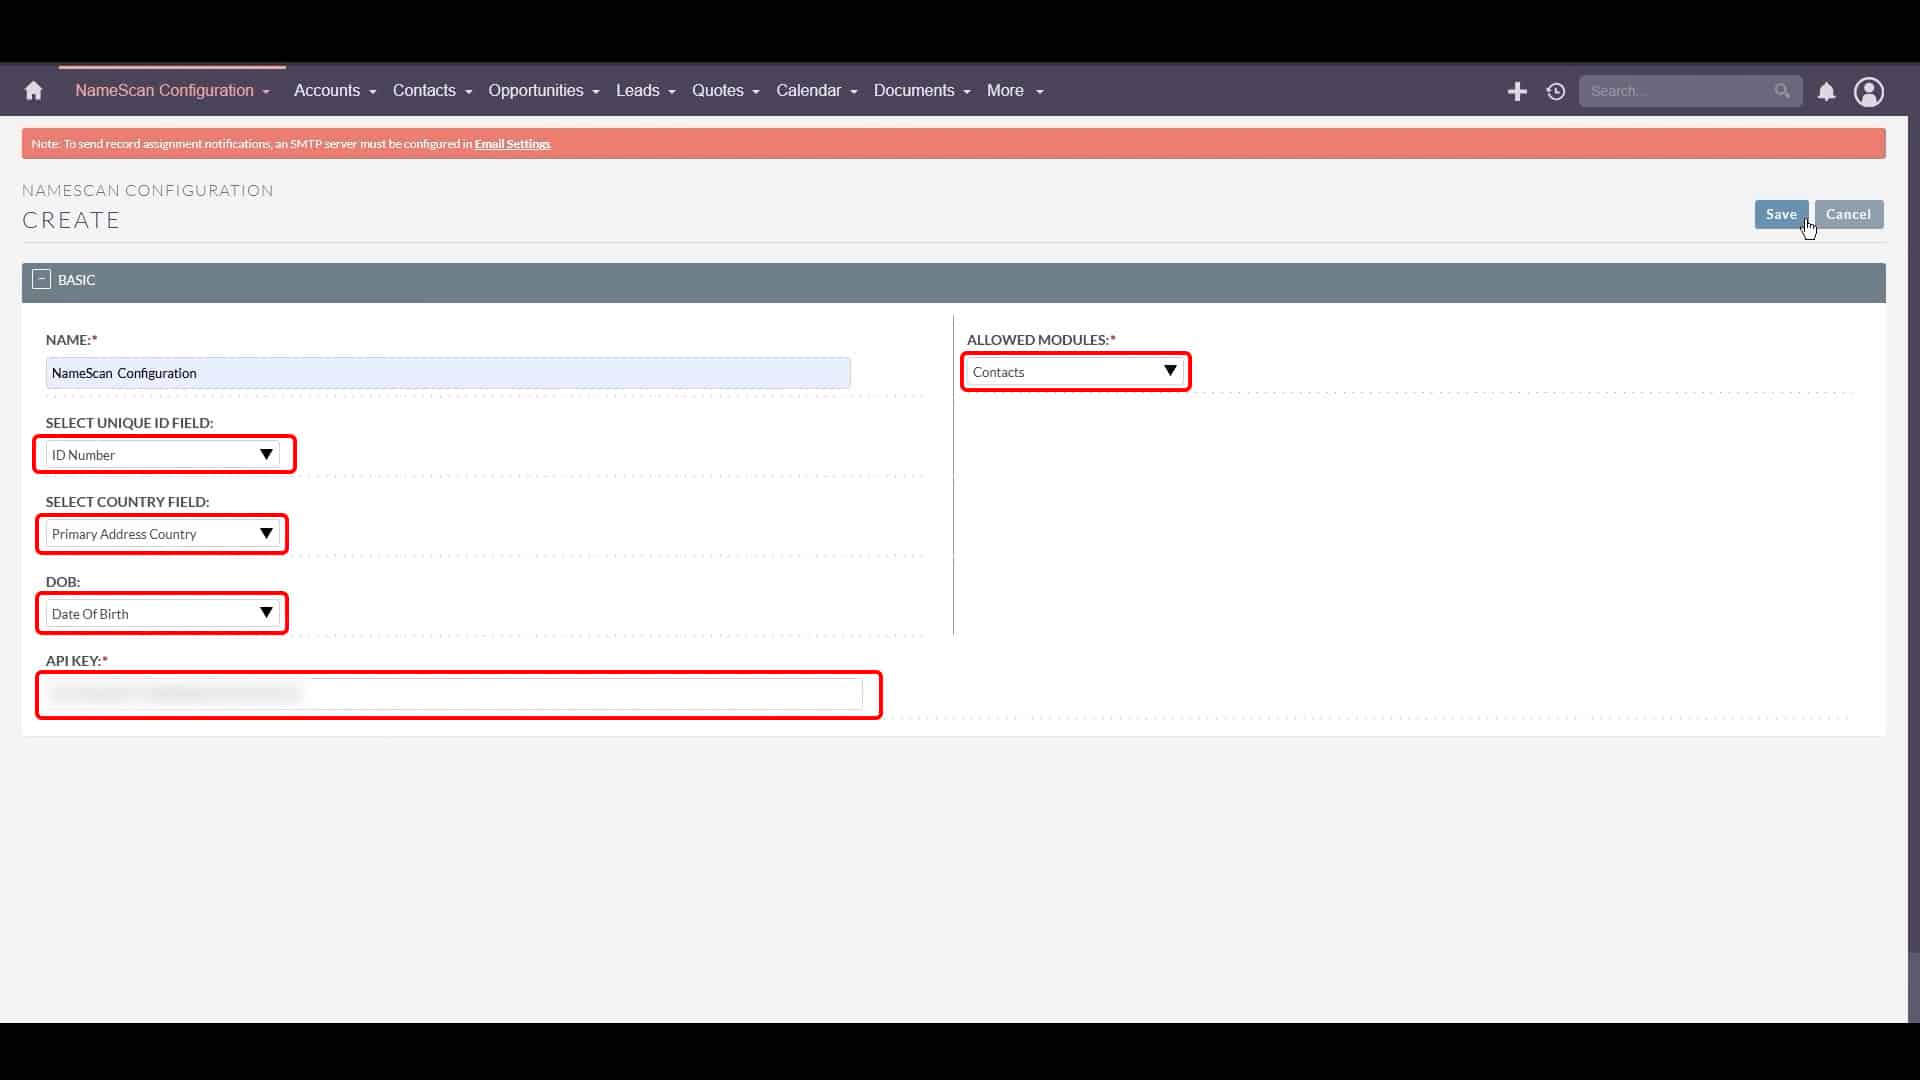
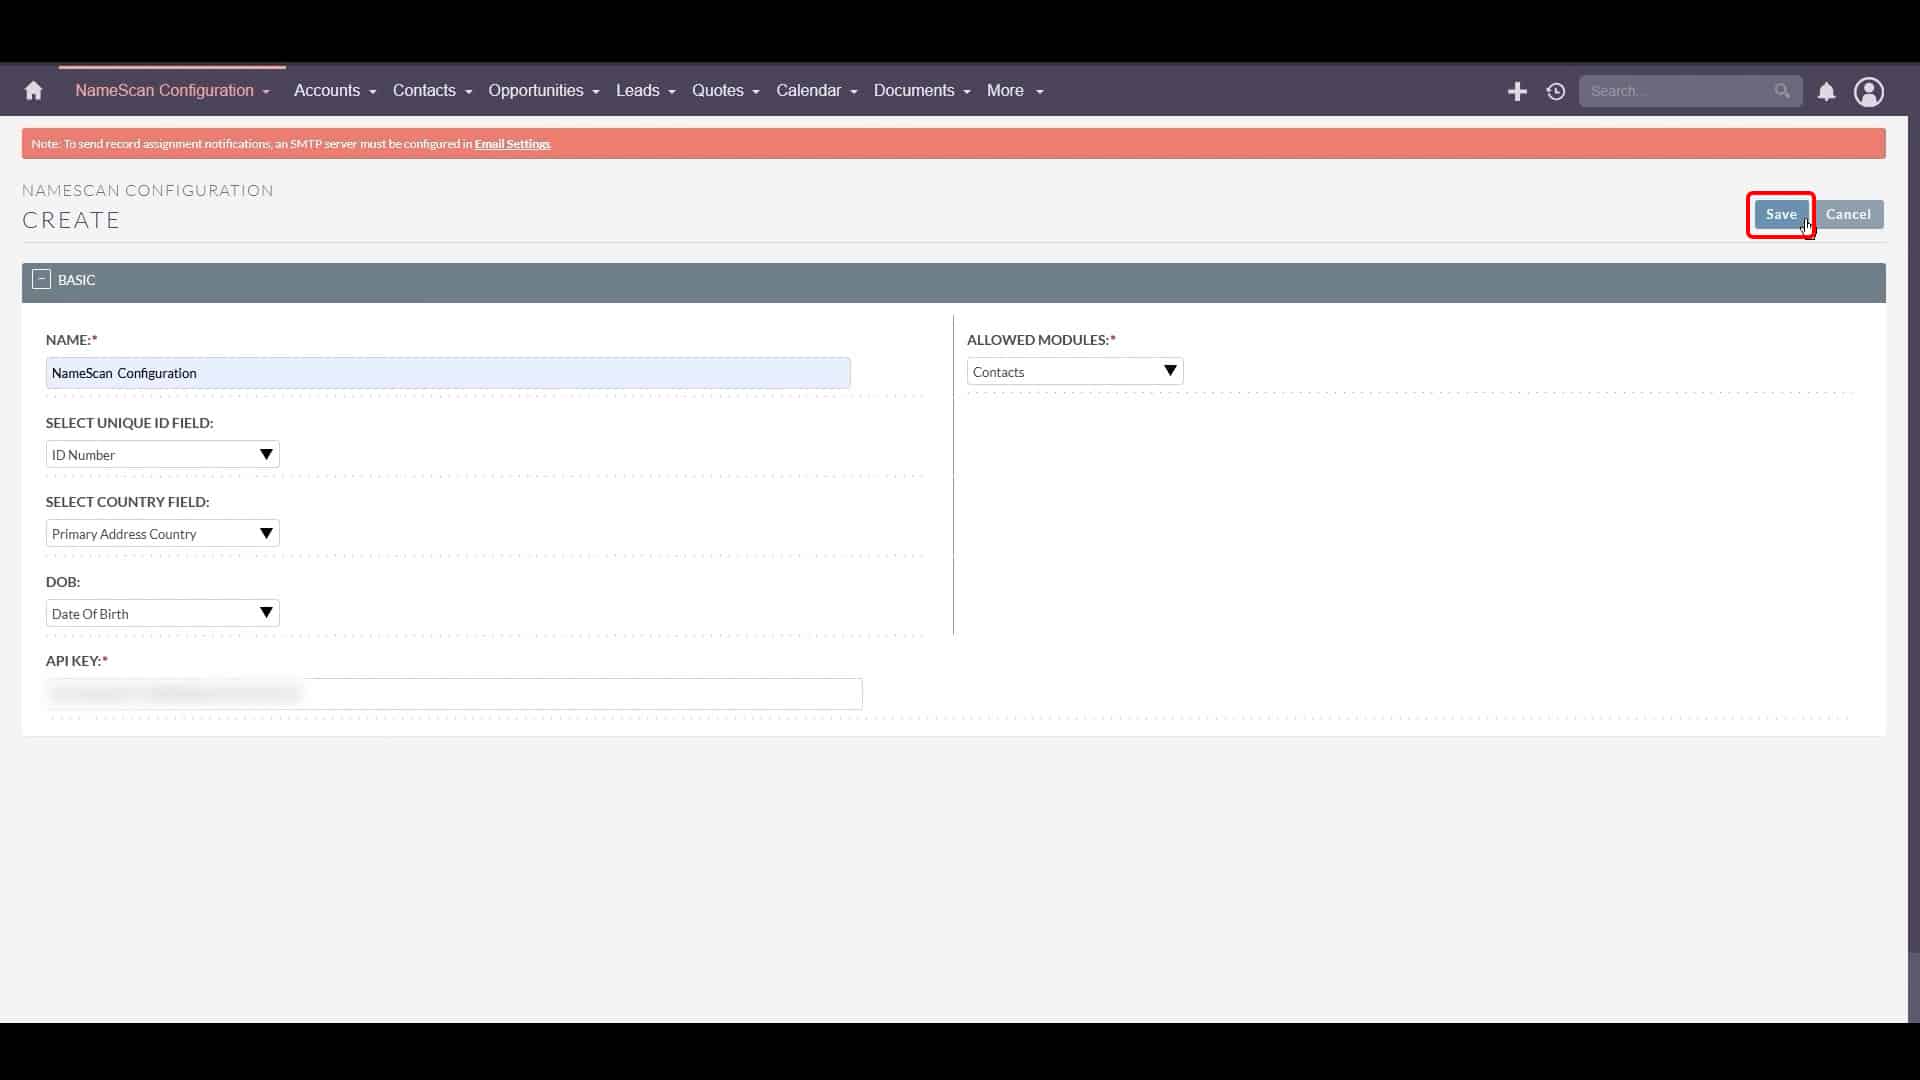
Which fields need to be configured in the NameScan settings, and what information is required for each?
You need to configure the following fields in the NameScan settings: The Unique ID Field (select the field in your SuiteCRM module that corresponds to the unique identifier, e.g., "ID Number"). The Country Field (select the field that corresponds to the contact's country, e.g., "Primary Address Country"). The Date of Birth Field (select the field that corresponds to the contact's date of birth, e.g., "Date of Birth"). You also need to enter your NameScan API Key, which is essential for NameScan to connect to the SuiteCRM instance.
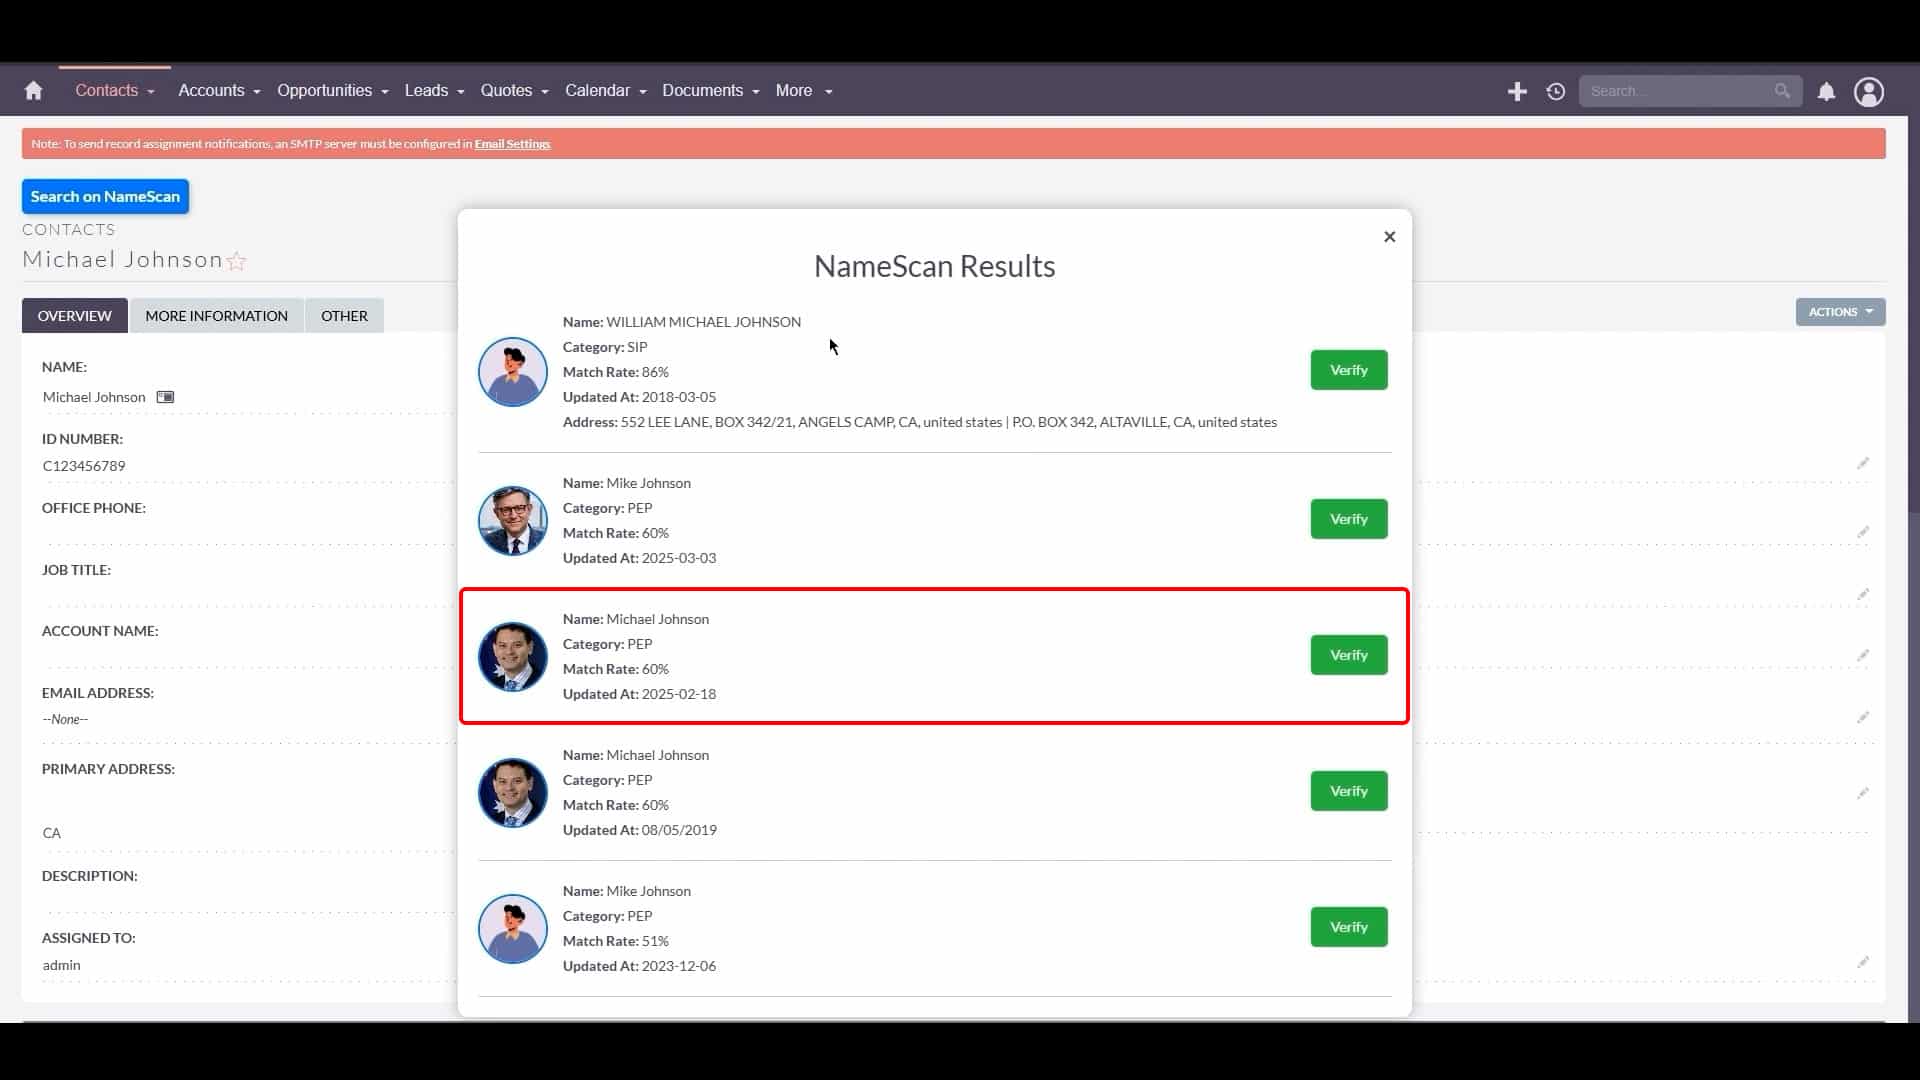
How do I initiate a NameScan search after configuring the settings?
After configuring and saving the NameScan settings for a specific record (e.g., a contact), locate and click the "Search on NameScan" button associated with that record. This action will prompt NameScan to scan its database for matches based on the information provided in the record.
What is NameScan and what are its key features within SuiteCRM?
NameScan is a tool designed to integrate with SuiteCRM to provide real-time screening of profiles against global watchlists. Its key features include real-time screening and customisable fields (allowing the use of unique IDs, country, and date of birth for more accurate searches). Detailed results showing match rates, categories, and timestamps, and an easy integration process into SuiteCRM.