


In this article, we are going to show you how to generate the Mailchimp API key and Webhook in simple steps. In order to keep your data synchronized with Mailchimp and integrate external applications with Mailchimp, you will need to have webhooks and API keys. Users encounter different kinds of problems, especially when they are creating a webhook in Mailchimp. Here, we have highlighted and troubleshooted them.
Mailchimp API Key
An API (Application Programming Interface) is a function that allows one application to interact and exchange data with any external software or application. In simple terms, API lets applications talk to each other. Below, we are going to discuss how to generate and use the Mailchimp API key. With the help of this, other applications will be able to access your Mailchimp account and for this, they won’t need your password.
How to Generate an API Key in Mailchimp?
The API key is a fundamental part of integrating apps with your Mailchimp account. For this, you will be required to generate an API key in Mailchimp. The users with Admin permissions can generate their own as well as other user’s API keys. However, the user with Manager permission can only generate and view their own API keys. Follow the steps mentioned below meticulously to generate an API key.
- From the left side navigation panel, click on the Account icon at the bottom left corner of the screen and select the “Account” option.
- Then, click on the “Extras” drop-down menu and select the “API Keys” option.
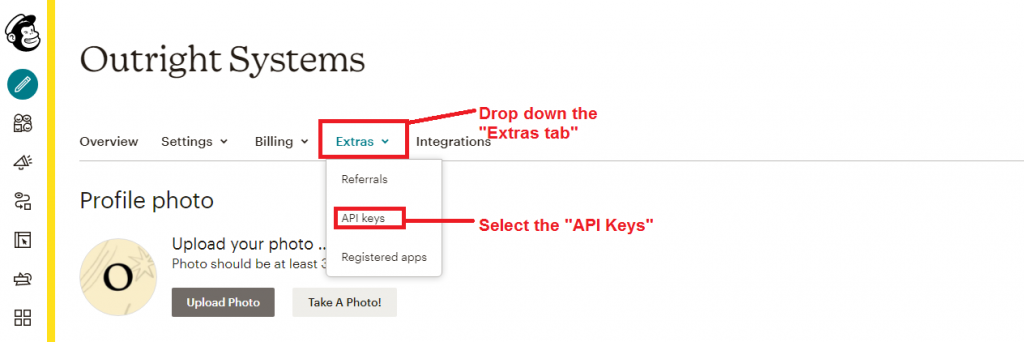
- Next, at the bottom of the page, you need to click on the “Create a Key” button.
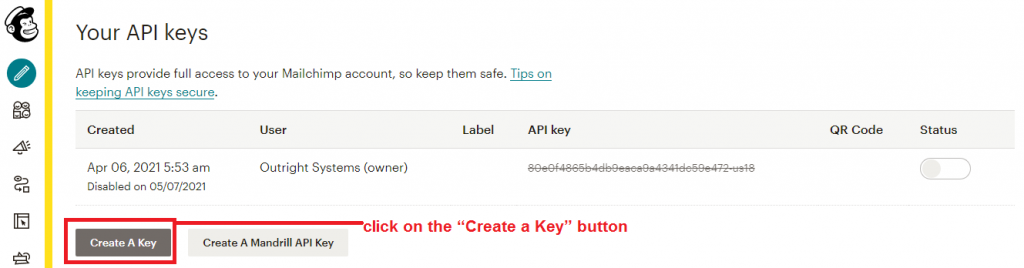
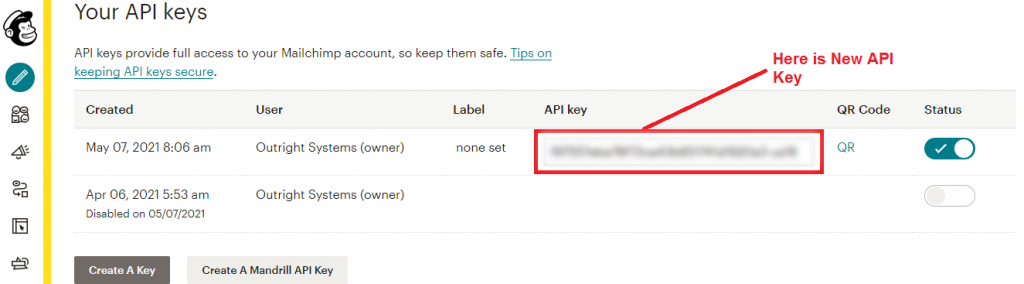
- You will be able to see the newly generated key in the Your API Keys section. There will be other details like date, user, status, Mailchimp QR code, and obviously QR code, and obviously the API key. You can copy it from here and easily use it to access your Mailchimp account.
NOTE: Since they provide full access to your Mailchimp account, you want to keep them safe. The best way to do so is to disable the key when not in use.
Mailchimp Webhooks
Using the Mailchimp Webhooks, your application can receive information about the email events and audiences as they happen in Mailchimp. There is only one thing required in order to create a webhook i.e. a valid callback URL that accepts HTTP Post requests. Mailchimp recommends using webhooks to keep CRM in sync with events occurring in Mailchimp software.
For example, if you set up a webhook that will trigger whenever a recipient clicks on the link present in the email. This information will be automatically updated in the CRM and you will be able to send a follow-up email to that particular recipient. Just like click, there are several other events that can trigger the webhooks like Sent, Opened, Bounced, Unsubscribed, etc. Without further ado, let’s see how to create a webhook in Mailchimp.
Create a Webhook in Mailchimp
Before moving on there is something we want you to keep in mind. As soon as a webhook is triggered based on the link you provided, Mailchimp will deploy an HTTP POST request to the callback URL you entered. The request will cancel if the response time is more than 10 seconds or the URL is unspecified. However, the system will send requests again for the next 75 minutes, and for every new retry, the time interval will increase gradually.
Now, you know the role of callback URL in the webhook and things you need to be careful about, let’s move forward.
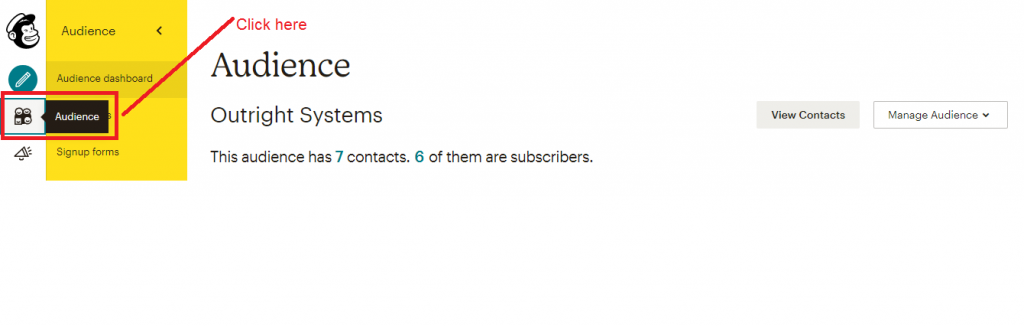
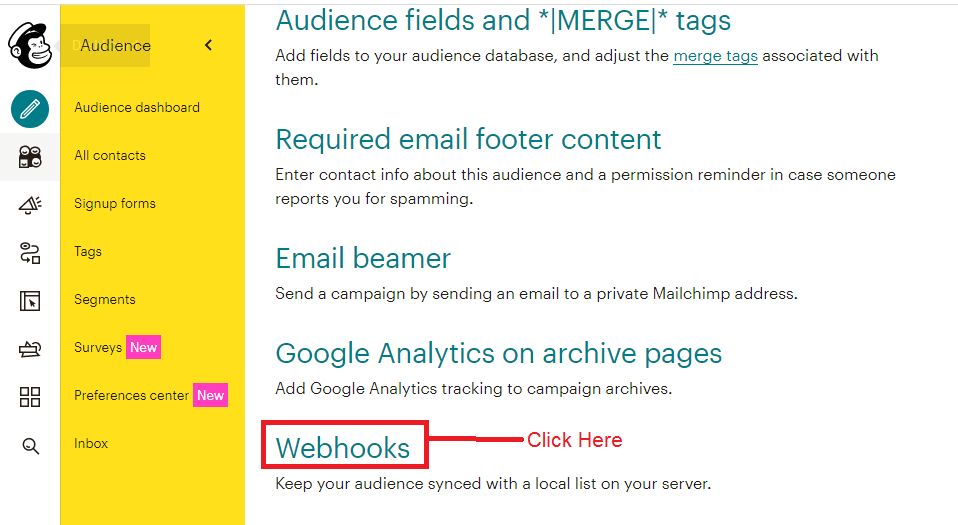
- Open Mailchimp and go to the Audience section.
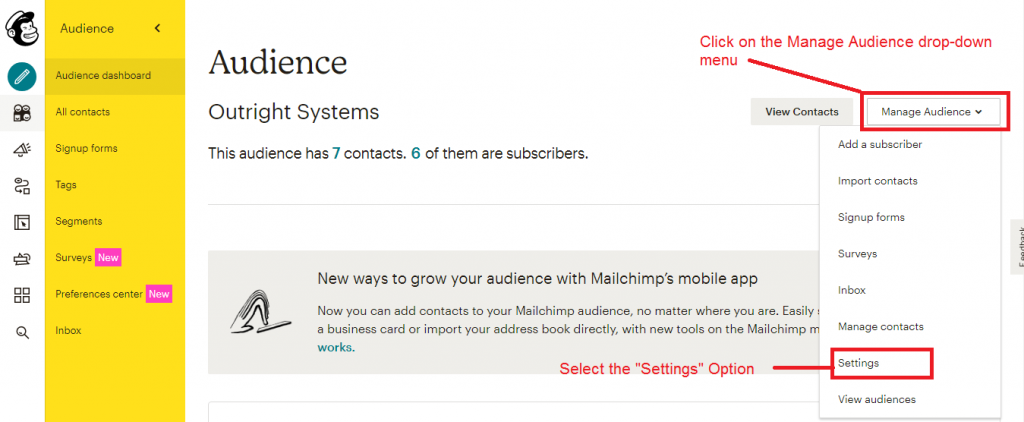
- Then, click on the Manage Audience drop-down menu and select the Settings option.
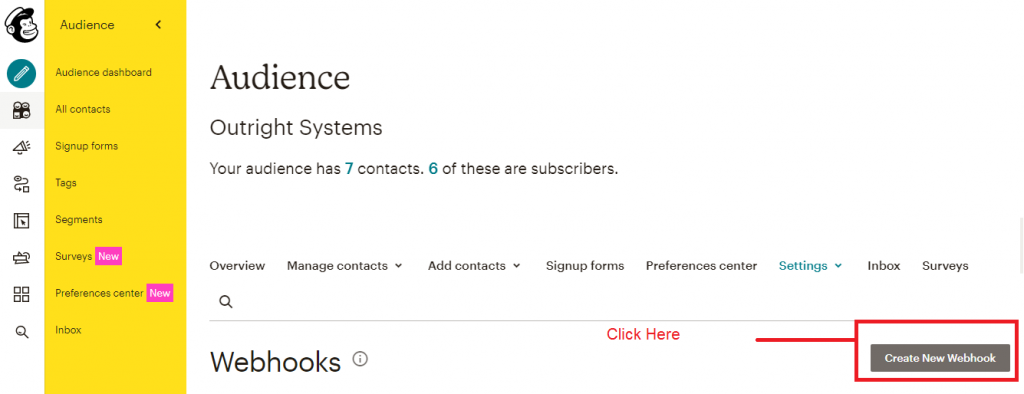
- This will redirect you to the Settings page. Here, scroll down to the bottom of the page and click on the Webhooks option.
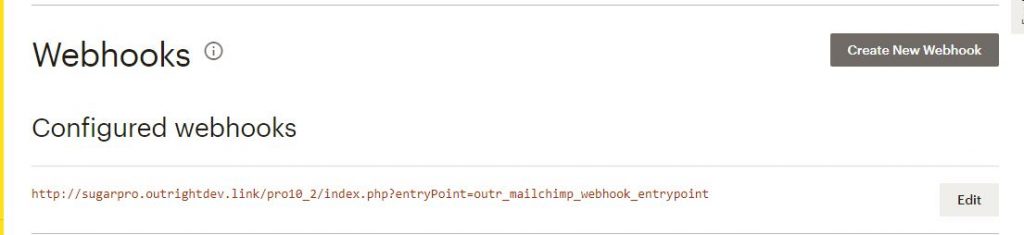
- Next, click on the create a new webhook button.
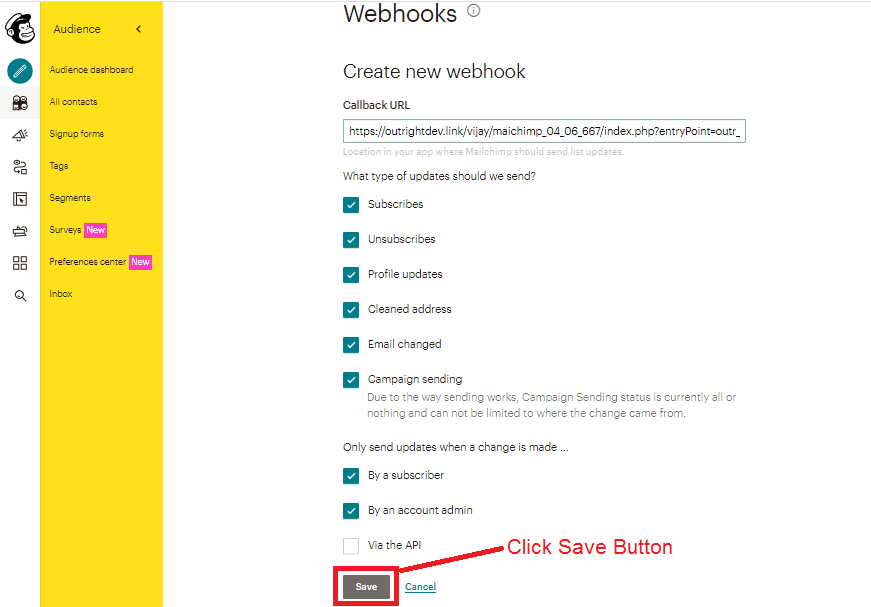
- On top, you will see the Callback field URL. In this field, add the URL of the application to which you want to send the webhook request. (When the link is verified, the Mailchimp audience data will be synced.)
- In the below section, you can select the events that will trigger the webhook, and after that click on the Save.
Now you have both the API key as well as webhook, you will be able to successfully integrate with Mailchimp and also sync the email and audience information in real-time. Make sure to enter the correct callback URL while creating the webhook. In addition to this, an API key can provide access to the Mailchimp account without any, so you need to keep it safe.