


There is nothing quite as euphoric as performing every action faster in records of SugarCRM. Are you doing the same every day regarding any operation? Or do you want to know how you can perform every activity in records promptly? If you are an amateur in the CRM industry then we believe this blog is especially for you. Here we are going to help you by providing in-depth knowledge related to Action Buttons in SugarCRM.
Action Buttons in SugarCRM Definition
Action button or we would say custom buttons that can be added to any record and that helps in performing the operations faster to save time.
For example: The team has given you the task to send emails to your leads. If you are working on any record it is better to do this operation from there. The shortcut process to perform this task is Action Buttons. You can directly send emails to your leads from the record. No complicated method at all!
With the help of this, you can perform so many actions swiftly such as creating/editing records, finding duplicates, opening an external web page, etc. Also, style and function in buttons can be easily configurable as everything depends on the specific condition even if it depends on role and team-based permission.
Please note: This facility of Action Buttons is currently not available for Sugar Professional (One of the top-most SugarCRM Pricing plans).
How to Configure Action buttons?
- Create a New field first from Studio and then click on the “Configure button” at the bottom of the field.
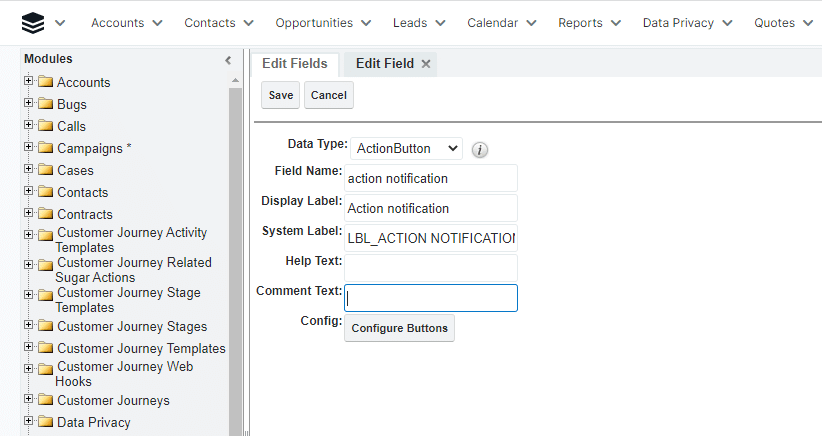
- Fill in all the information in the Configuration drawer.
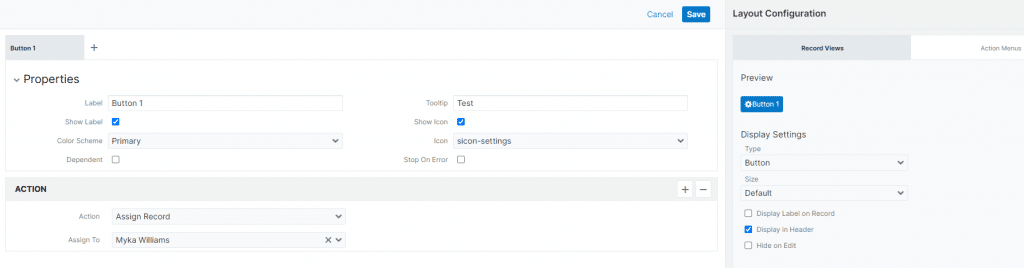
You will see the sections like: Header, Properties, Layout configurations, and Action
Header: In this section, you will see tabs representing each button of the current field.
Properties: Here you will see various visual options like Labels, color schemes, etc.
Layout configuration: You can see additional display options for the action buttons.
Action: It’s about the action when a user clicks on the action button.
How can you assign various actions on the same button?
Have you completed the above steps? If yes, follow the procedure below-
- Tap on the + icon. You will find it on the Action Block.

- Select the action you want to take. Also, repeat for additional action.
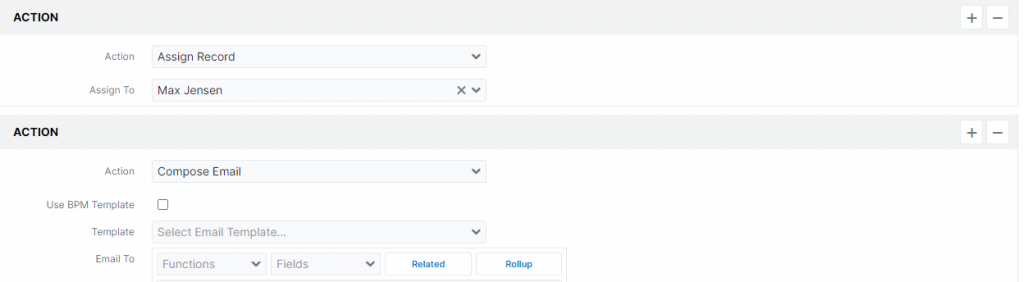
- You can also change the order of the action process by just doing drag and drop action blocks.
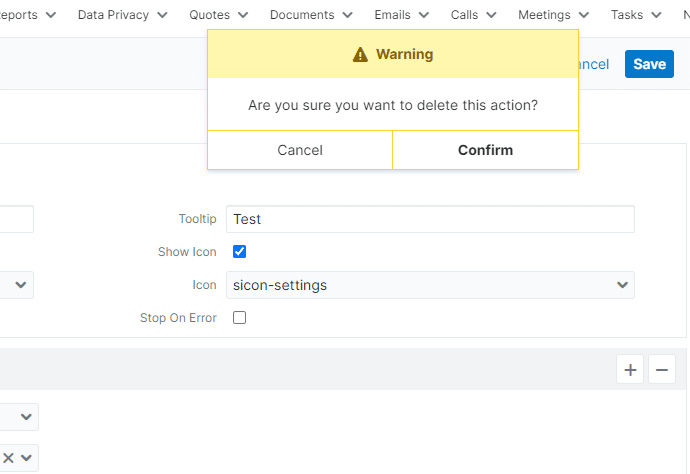
- Click on the - icon to delete the action.
- Select the Confirmation button as you will receive a confirmation message.
Action button for sending an Email
Send an email to your leads or your team directly from the module. Check out the steps below to know how to do that:
- Your first step is to create a field in any module.
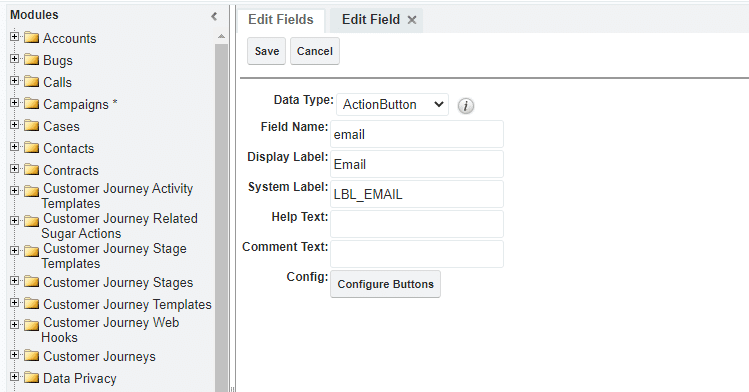
- Next is to configure the fields: write down the field name, set the properties, and display settings, action, and template. In Email to, share the email address of your team/leads.
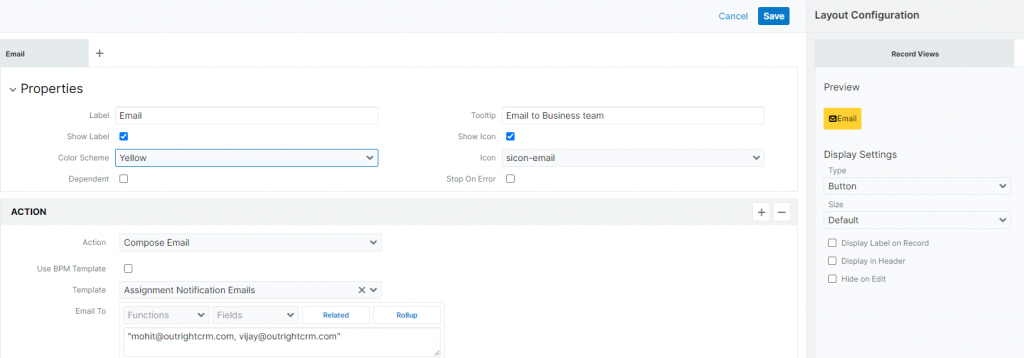
- The last is to save that field