Just build the ideas for making an Email campaign and then start running from SugarCRM software. No matter how many strategies you know very well, the never-dying way to get the audience on time is the Email campaign. It’s easy to send Campaign or Newsletter to a set of leads and contacts from the Sugar platform. Surprisingly, you can even track the entire activity of your campaign in a few clicks. So, today we are going to share a comprehensive overview of “creating an Email Campaign in SugarCRM software”.
How many methods are there for creating campaigns?
Before you pounce into the SugarCRM Campaign method, you should be aware of the methods available in SugarCRM that can help you in creating email campaigns.
- First Method is Wizard: When you go for this, it will enable you to guide the tour on creating a campaign step by step. Every user here will get the best guidance on the items such as Target list and Tracker URLs that should be completed before running the campaign for the audience.
- Second Method is Classic: Here a user can freely create an email campaign without progressing step-by-step guidance. Suppose the campaign record you created. The user can set the target list by itself and can create Tracker URLs and email marketing records.
What do you need before going to send out an Email campaign?
- Your first task is to configure Sugar to send an outbound email. And for this, go to the Admin section and then click on Email Settings.

- Next, just specify the number of emails sent per batch. For this, go to the Admin section and then click on Campaign Email Settings.

- Now your next task is to create a Bounce-handling inbox just for bounced campaign emails. You can do this by clicking on Admin>inbound email.

- You can take advantage of the Scheduler job by configuring it and it will send an email campaign automatically. First, go to Admin>Scheduler>Run Nightly Mass Email Campaigns Scheduler.
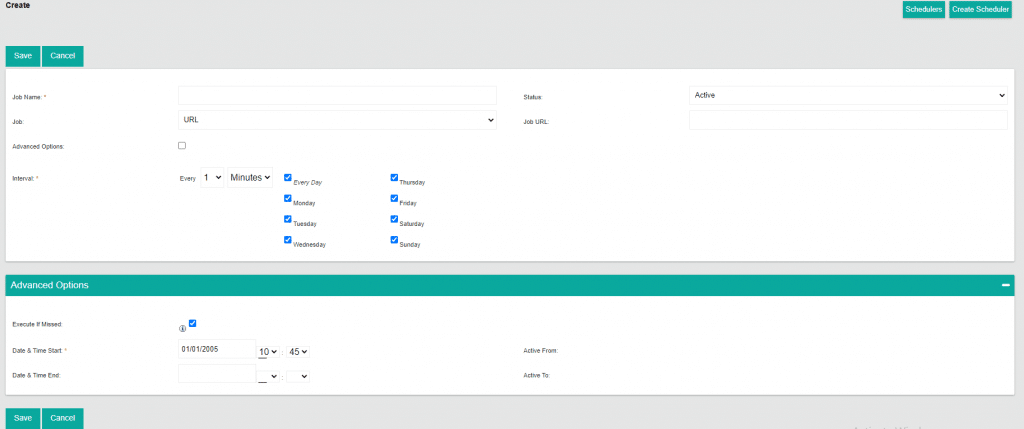
- The last process is to configure the Scheduler Job just to process the Bounced email campaign. To do this: Admin>Scheduler>Run Nightly Process Bounced Campaign Emails Scheduler.
How to create a Campaign in SugarCRM?
- In the Campaign Module tab, your first step is to tap on “Create Campaign (Classic)”.

- Your next step is to fill out the entire information that is given there. You can see information like: Name, Status, Start Date, End Date, Budget Actual Cost and much more.
- Click on Save button.

Target List
Let’s understand what the role of the Target List is. You can send mass email campaigns to a group of individuals or big organizations. If you want to use the SugarCRM Email Campaign then the jotted points below are very crucial for you to understand. You can explore how to add default or test target lists to the Campaign.
- Select the Target List Subpanel.

- Moving onto the next step where you have to choose the Target list to add to your email campaign. Bear in mind: you have to select one test target list for sending purposes.

- The final step is to click on the Select button. Now you can see that the Target lists that you selected will appear in the Target list subpanel.

How can you Create a Tracker URL for the Email Campaign?
Basically, the Tracker URLs are the links that are fixed into the email template which enable you to get aware of the recipients that how they all are using campaign email. Have a look at the points given below-
- You will see the Create option in the Tracker URLs Subpanel. Click on it.

- Your next task is to enter the Tracker URL information. You will see options like Tracker Name, Tracker URL, and Opt-out Link.

- The third and final step is to tap on “Save” and you can check the Tracker record in the Tracker URLs Subpanel.

How to Create an Email Marketing Record?
If you are curious to know how to create email marketing records in the Email Marketing Subpanel then you landed in the right place. Let’s dig in-
- Your first step is to tap on the “Create” button from the Email Marketing Subpanel.

- The next step is to select the Campaign Email template, Target lists, and Bounce handling account. Then set the date and time the email campaign is triggered.

- The last step is just to click on the Save option and your record of email marketing is created in the Email Marketing Subpanel.

Steps to Test the SugarCRM Campaign easily
Let's plunge into the steps below to find out the easiest way to test the SugarCRM Campaign. Here we go-
- Select the Target List from the Campaigns.

- Click on Send Test from Detail View.

- Select your Campaign again and click on Send.

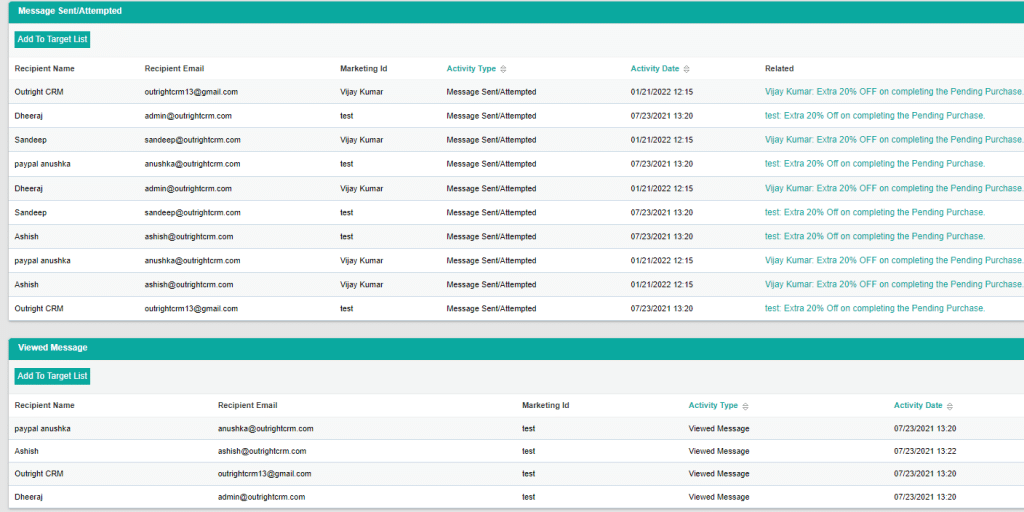
- Now you can see the Campaign is running successfully. The below screenshot is explaining how many received the campaign and how many have seen it.
Concluding remarks: The concluding part of this whole article is that the SugarCRM Campaign process is not so challenging if done with the right steps. We guided you in brief about the Email Campaign in the SugarCRM platform. Moreover, you can also learn how to test the campaign in Sugar software. Let’s see how many will now start working on the email template to fetch new audiences.

